From inside (document excerpt):
GB Operator´s manual SAW ATTACHMENT FR Manuel d’utilisation ACCESSOIRE DE SCIAGE ES Manual de instrucciones SUPLEMENTO DE SIERRA Please read these instructions carefully and make sure you understand them before using the machine. Lire attentivement et bien assimiler le manuel d’utilisation avant d’utiliser la machine. Lea detenidamente el manual de instrucciones y asegúrese de entender su contenido antes de utilizar la máquina. GB FR ES SYMBOL EXPLANATION Symbols WARNING! Clearing saws, brushcutters and trimmers can be dangerous! Careless or incorrect use can result in serious or fatal injury to the operator or others.
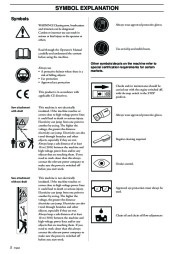
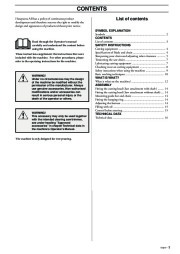
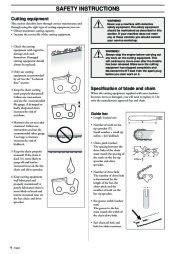
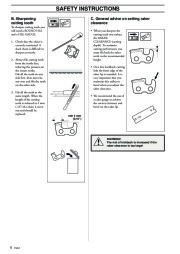
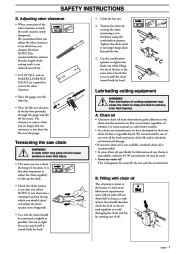
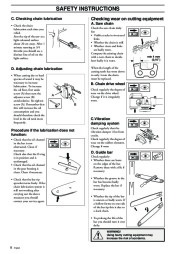
Read through the Operator`s Manual carefully and understand the content before using the machine. Always wear approved protective gloves. Use anti-slip and stable boots. Always use · A protective helmet where there is a risk of falling objects · Ear protection · Approved eye protection This product is in accordance with applicable CE directives. Other symbols/decals on the machine refer to special certification requirements for certain markets. Checks and/or maintenance should be carried out with the engine switched off, with the stop switch in the STOP position. Saw attachment with shaft This machine is not electrically insulated. If the machine touches or comes close to high-voltage power lines it could lead to death or serious injury. Electricity can jump from one point to another by arcing. The higher the voltage, the greater the distance electricity can jump. Electricity can also travel through branches and other objects, especially if they are wet. Always keep a safe distance of at least 10 m (30 ft) between the machine and high-voltage power lines and/or any objects that are touching them. If you need to work closer than this always contact the relevant power company to make sure the power is switched off before you start work. This machine is not electrically insulated. If the machine touches or comes close to high-voltage power lines it could lead to death or serious injury. Electricity can jump from one point to another by arcing. The higher the voltage, the greater the distance electricity can jump. Electricity can also travel through branches and other objects, especially if they are wet. Always keep a safe distance of at least 10 m (30 ft) between the machine and high-voltage power lines and/or any objects that are touching them. If you need to work closer than this always contact the relevant power company to make sure the power is switched off before you start work. Always wear approved protective gloves. Regular cleaning required. Ocular control. Saw attachment without shaft Approved eye protection must always be used. Chain oil and chain oil flow adjustment 2 English CONTENTS Husqvarna AB has a policy of continuous product development and therefore reserves the right to modify the design and appearance of products without prior notice. List of contents SYMBOL EXPLANATION Symbols . 2 CONTENTS List of contents 3 SAFETY INSTRUCTIONS Cutting equipment 4 Specification of blade and chain . 4 Sharpening your chain and adjusting raker clearance . 5 Tensioning the saw chain . 7 Lubricating cutting equipment 7 Checking wear on cutting equipment 8 Safety insructions when using the machine 9 Basic working techniques . 10 WHAT IS WHAT? What is what on the machine? . 12 ASSEMBLY Fitting the cutting head (Saw attachment with shaft ) 14 Fitting the cutting head (Saw attachment without shaft) 14 Mounting guide bar and chain . 14 Fitting the hanging ring . 14 Adjusting the harness . 14 Filling with oil . 15 Control before starting . 15 TECHNICAL DATA Technical data 16 Read through the Operator`s manual carefully and understand the content before using the machine. These instructions supplement the instructions that were included with the machine. For other procedures, please refer to the opertaing instructions for hte machine. ! ! WARNING! Under no circumstances may the design of the machine be modified without the permission of the manufacturer. Always use genuine accessories. Non-authorised modifications and/or accessories can result in serious personal injury or the death of the operator or others. WARNING! This accessory may only be used together with the intended clearing saw/trimmer, see under heading “Approved accessories ” in chapter Technical data in the machine’s Operator’s Manual. The machine is only designed for tree pruning. English 3 SAFETY INSTRUCTIONS Cutting equipment This section describes how through correct maintenance and through using the right type of cutting equipment you can: · Obtain maximum cutting capacity. · Increase the service life of the cutting equipment. ! ! WARNING! Never use a machine with defective safety equipment. The safety equipment should be maintained as described in this section. If your machine does not meet any of these controls you should contact your service workshop. 1 Check the cutting equipment with regard to damage and crack formation. Damaged cutting equipment should always be replaced. 2 Only use cutting equipment recommended by us! See the “Technical data ” section. 3 Keep the chain cutting teeth properly sharpened! Follow our instructions and use the recommended file gauge. A damaged or badly sharpened chain increases the risk of accidents. 4 Maintain the correct raker clearance! Follow our instructions and use the recommended raker gauge. Too large a clearance increases the risk of kickback. 5 Keep the chain properly tesioned! If the chain is slack it is more likely to jump off and lead to increased wear on the bar, chain and drive sprocket. 6 Keep cutting equipment well lubricated and properly maintained! A poorly lubricated chain is more likely to break and lead to increased wear on the bar, chain and drive sprocket. WARNING! Always stop the engine before carrying out any work on the cutting equipment. This will continue to move even after the throttle has been released. Make sure the cutting equipment has stopped completely and disconnect the HT lead from the spark plug before you start work on it. Specification of blade and chain When the cutting equipment supplied with your machine becomes worn or damaged, you will need to replace it. Use only the manufacturer approved bar and chain. Guide bar · Length (inches/cm) · Number of teeth on bar tip sprocket (T). Small number = small tip radius = low kickback · Chain pitch (inches) The spacing between the drive links of the chain must match the spacing of the teeth on the bar tip sprocket and drive sprocket. · Number of drive links The number of drive links is determined by the length of the bar, the chain pitch and the number of teeth on the bar tip sprocket.
Wikipedia’s page for Husqvarna
Publisher: www.husqvarna.com


 Husqvarna S 36 Oregon 90 91 VG SG Saw Attachment Chainsaw Owners Manual EN FR ES, 2002,2003 - 1 of 52
 Husqvarna S 36 Oregon 90 91 VG SG Saw Attachment Chainsaw Owners Manual EN FR ES, 2002,2003 - 2 of 52
 Husqvarna S 36 Oregon 90 91 VG SG Saw Attachment Chainsaw Owners Manual EN FR ES, 2002,2003 - 3 of 52
 Husqvarna S 36 Oregon 90 91 VG SG Saw Attachment Chainsaw Owners Manual EN FR ES, 2002,2003 - 4 of 52
 Husqvarna S 36 Oregon 90 91 VG SG Saw Attachment Chainsaw Owners Manual EN FR ES, 2002,2003 - 5 of 52
 Husqvarna S 36 Oregon 90 91 VG SG Saw Attachment Chainsaw Owners Manual EN FR ES, 2002,2003 - 6 of 52
 Husqvarna S 36 Oregon 90 91 VG SG Saw Attachment Chainsaw Owners Manual EN FR ES, 2002,2003 - 7 of 52
 Husqvarna S 36 Oregon 90 91 VG SG Saw Attachment Chainsaw Owners Manual EN FR ES, 2002,2003 - 8 of 52
 Husqvarna S 36 Oregon 90 91 VG SG Saw Attachment Chainsaw Owners Manual EN FR ES, 2002,2003 - 9 of 52
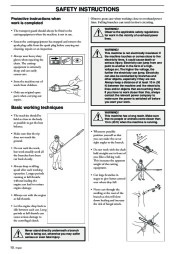 Husqvarna S 36 Oregon 90 91 VG SG Saw Attachment Chainsaw Owners Manual EN FR ES, 2002,2003 - 10 of 52