From inside (document excerpt):
101 Plus – 160 Pro 140 Plus – 202 Pro Patent pend. komet Innovative Irrigation Products – Operating instructions – Betjeningsvejledning – Handhavande instruktioner – Brukerveiledning – Käyttöohjeet – Kezelési útmutató – A B C D – Gebrauchsanweisung – Istruzione d’uso – Instructions d’utilisation – Instrucciones de uso – Instruções de utilisação – Gebruikers instructies English Deutsch Italiano Français – Spare parts – Ersatzteile – Ricambi – Pièces de rechange – Piezas de recambio – Peças de reposição – Onderdelen – Trouble shooting – Fehlersuche – Ricerca guasti – Recherche des pannes – Busca de los desperfectos – Identificação de defeitos – Probleem oplossing – Service instructions – Service Anleitungen – Istruzioni di servizio – Instructions de service – Instrucciones de servicio – Instruções de serviço – Service instructies – Reservedele – Reservdelar – Reservedeler – Varaosat – Alkatrészek – Espanõl Português Nederlands Dansk Svenska Norsk Suomi – Problemlösning – Felsökning – Feilsøking – Vian etsintä – Hibakeresés – – Vedligeholdelsesinstruktioner – Service instruktioner – Serviceveiledning – Huolto-ohjeet – Szerviz útmutató – Magyar A Mod.
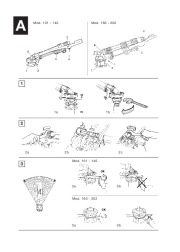
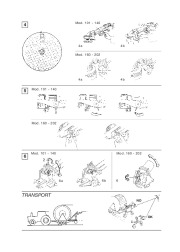
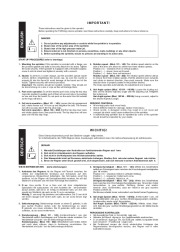
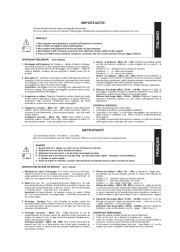
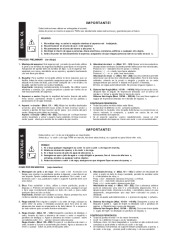
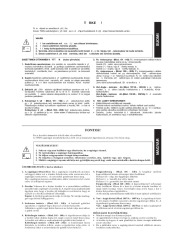
101 – 140 Mod. 160 – 202 1 1a 1b 2 2a 2b Mod. 101 – 140 2c 3 3a 3b Mod. 160 – 202 3a 3b 4 Mod. 101 – 140 4a Mod. 160 – 202 4b 4a 4b 5 Mod. 101 – 140 Mod. 160 – 202 6 Mod. 101 – 140 Mod. 160 – 202 6a 6b 6 TRANSPORT NO OK I M P O RTA N T ! ENGLISH These instructions must be given to the operator. Before operating the TWIN big volume sprinkler, read these instructions carefully. Keep instructions for future reference. DANGER! 1. 2. 3. 4. 5. Do not perform any adjustments or controls while the sprinkler is in operation. Stand clear of the action area of the sprinkler. Stand clear of the high pressure water jet. Ensure water jet is not directed on persons, powerlines, roads, buildings or any other objects. Before operating the sprinkler, ensure no persons are standing in its action area. START-UP PROCEDURES (refer to drawings) 1. Mounting the sprinkler: If the sprinkler is provided with a flange, use the provided gasket and bolts to securely attach it to its stand. Tighten the bolts securely. If the sprinkler is equipped with a threaded adaptor, screw it onto its stand and tighten it securely with a wrench. 2. Nozzle: To perform a nozzle change, use the provided special nozzle wrench. Before retightening the nozzle cap, be sure the nozzle is properly fit into the barrel to avoid damage of the barrel and of the nozzle. Tighten securely with wrench provided. Important: The nozzles should be handled carefully. They should not be stored strung on a wire or rope as this will damage them. 3. Part circle operation: To set the desired part circle, bring the trip stop rings into position by pulling each of them at one end only or by pushing on one end from the inside. Do not push on the ends from the outside as the rings will block. 4. Full circle operation – (Mod. 101 – 140): Loosen the trip engagement bolt, rotate reverse rod 1/4 turn up and retighten the bolt. The reverse rod will now pass above the trip stop rings. Full circle operation – (Mod. 160 – 202): Pull the trip stop lever back and rotate upside down, then push forward. The trip stop lever will now pass over the trip stop rings. 5. Rotation speed – (Mod. 101 – 140): The rotation speed selector on the side of the drive arm allows to select from three rotation speeds. Position ( O ) – standard; lever in vertical position. Position ( ) – slower; lever set forward. Position ( + ) – faster; lever set backward. Rotation speed – (Mod. 160 – 202): The rotation speed selector allows to choose from three rotation speeds. Pull the selection lever outwards and rotate in desired direction, then push inwards. Make sure the selection lever is properly seated in the position desired. The brake operates automatically. No adjustments are required. 6. Vari-Angle system (Mod. 101 VA – 140 VA): Loosen the locking nut, then set the desired trajectory angle with the adjusting nut. Retighten the locking nut. Vari-Angle system (Mod. 160 VA – 202 VA): Using a wrench, adjust to the desired trajectory angle. PERIODIC CONTROLS: · All movings parts must move freely. · Check deflector blade for damage, replace if necessary. · Check nozzle. A damaged nozzle may result in a not round and compact jet which could cause malfunction of the sprinkler. · A malfunctioning sprinkler due to repeated tip overs of the sprinkler mount should be inspected by your dealer. WICHTIG! DEUTSCH Diese Gebrauchsanweisung muß dem Bediener ausgehändigt werden. Vor Inbetriebnahme des TWIN Regners diese Anweisungen aufmerksam lesen. Die Gebrauchsanweisung ist aufzubewaren. GEFAHR! 1. 2. 3. 4. 5. Niemals Einstellungen oder Kontrollen am funktionierenden Regner ausführen. Sich nicht im Arbeitsbereich des Regners aufhalten. Sich nicht in die Wurfparabel des Hochdruckstrahles stellen. Den Wasserstrahl nicht auf Personen, elektrische Leitungen, Straßen, Gebäude oder andere Gegenstände richten. Bevor der Regner unter Druck gesetzt wird, sich vergewissern, daß sich niemand in seinem Arbeitsbereich aufhält. (siehe Zeichnungen) 5. Drehgeschwindigkeit – (Mod. 101 – 140): Mittels des Schalthebels seitlich am Schwingarm kann zwischen drei Vorschubsgeschwindigkeiten gewählt werden. Position ( O ) – standard; Hebel in vertikaler Stellung. Position ( ) – langsamer; Hebel nach vorne. Position ( + ) – schneller; Hebel zurück. Drehgeschwindigkeit – (Mod. 160 – 202): Mittels des Schalthebels kann zwischen drei Vorschubgeschwindigkeiten gewählt werden. Hebel herausziehen, in gewünschter Richtung drehen und wieder hineindrücken. Sicherstellen, dass der Hebel in der gewünschten Position arretiert ist. Die Bremse arbeitet immer automatisch und bedarf keiner Regulierung. 6. Vari-Angle System (Mod. 101 VA – 140 VA): Arretiermutter lösen, mit der Einstellmutter den gewünschten Strahlneigungswinkel einstellen. Arretiermutter wieder sorgfältig anziehen. Vari-Angle System (Mod. 160 VA – 202 VA): Mittels eines Maulschlüßels den gewünschten Strahlneigungswinkel an der Stellschraube einstellen. PERIODISCHE KONTROLLEN: · Alle beweglichen Teile müßen leichtgängig sein. · Ablenker auf Beschädigung prüfen, gegebenenfalls austauschen. · Düse auf Beschädigung prüfen. Ein nicht gebündelter, kompakter Strahl kann Ursache für Funktionsstörungen sein. · Bei Funktionsstörungen die durch wiederholtes Umkippen des Regnerstandes hervorgerufen wurden, den Regner vom Händler kontrollieren lassen.


 Toro Owners Manual - 1 of 80
 Toro Owners Manual - 2 of 80
 Toro Owners Manual - 3 of 80
 Toro Owners Manual - 4 of 80
 Toro Owners Manual - 5 of 80
 Toro Owners Manual - 6 of 80
 Toro Owners Manual - 7 of 80
 Toro Owners Manual - 8 of 80
 Toro Owners Manual - 9 of 80
 Toro Owners Manual - 10 of 80