From inside (document excerpt):
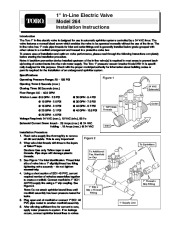
1 ” In-Line Electric Valve Model 264 Installation Instructions Introduction The Toro 1 ” in-line electric valve is designed for use in automatic sprinkler systems controlled by a 24 VAC timer. The valve features a manual bleed screw which enables the valve to be operated manually without the use of the timer. The in-line valve has 1 ” male pipe threads for inlet and outlet fittings and is generally installed below grade grouped with other valves in a manifold arrangement and housed in a protective valve box.
Lawn Sprinkler User Manual Free Download. Irrigation Free Instruction Manual Download PDF.
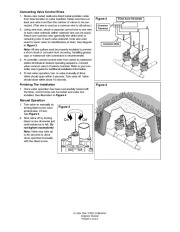
To ensure ease of installation and optimum valve performance, please read through the following instructions completely before starting the installation procedure. Note: A backflow prevention device installed upstream of the in-line valve(s) is required in most areas to prevent backsiphoning of contaminants into the main water supply. The Toro 1 ” pressure vacuum breaker Model 220-14 is specifically designed for this purpose. Check with the proper municipal authority for information about building codes or permits required for the installation of an underground sprinkler system. Specifications Operating Pressure Range: 20 150 PSI Opening Time: 5 Seconds (max.) Closing Time: 60 Seconds (max.) Flow Range: 0.5 45.0 GPM Friction Loss: @ 5 GPM – 2.0 PSI @ 10 GPM – 2.0 PSI @ 15 GPM – 2.3 PSI @ 20 GPM – 3.1 PSI @ 25 GPM – 4.0 PSI Voltage Required: 24 VAC (nom.), 19 VAC (min.), 60 Hz Solenoid Current Draw: Inrush – .25 Amps (max.) @ 24 VAC Holding – .19 Amps (max.) @ 24 VAC Installation Procedure 1. Flush valve supply line thoroughly to remove all dirt and debris. This is very important! 2. Wrap valve inlet threads with three to five layers of TeflonTM tape. Caution: Use only Teflon tape to seal threads. Pipe dope will damage plastic threads. 3. See Figure 1 for inlet identification. Thread inlet side of valve into a 1 ” slip/slip/thread tee fitting tightening valve securely do not tighten excessively. 4. Using a short section of SCH 40 PVC, cement required number of valve/tee assemblies together to create a manifold. Connect manifold to 1 ” SCH 40 PVC supply line using a 1 ” slip coupling. See Figure 2. Note: Do not attach sprinkler lateral lines until manifold assembly has been pressure tested for leaks. 5. Plug open end of manifold or connect 1 ” SCH 40 PVC pipe routed to another manifold assembly. 6. After allowing sufficient time for cement to cure, apply water pressure to system. If no leakage occurs, connect sprinkler lateral lines to valves. Inlet 24 VAC Solenoid Figure 1 @ 30 GPM – 5.4 PSI @ 35 GPM – 7.0 PSI @ 40 GPM – 8.7 PSI @ 45 GPM – 10.5 PSI 1 ” NPT Male Threads Outlet w Flo n tio ec Dir Figure 2 To Sprinklers To Additional Tee, Manifold or Cap 1 ” Thread x Slip Fitting 1 ” Slip x Slip x Thread Fitting 1 ” Supply Line Connecting Valve Control Wires 1. Route color coded multi-wire direct burial sprinkler cable from timer location to valve manifold. Cable must have at least one wire more than the number of valves to be connected. (This wire is used as a common wire to all valves.) 2. Using wire nuts, attach a separate control wire to one wire of each valve solenoid (either solenoid wire can be used). Attach one common wire (generally the white wire) to remaining wire of each valve solenoid. Note wire color used for each valve for identification at timer. See diagram in Figure 3. Note: All wire splices must be properly insulated to prevent a short circuit or corrosion from occurring. Installing grease caps or waterproof wire connectors is recommended. 3. At controller, connect control wires from valves to numbered station terminals in desired operating sequence. Connect valve common wire to Common terminal. Refer to your controller user’s guide for additional installation information. 4. To test valve operation, turn on valve manually at timer. Valve should open within 5 seconds. Turn valve off. Valve should close within about 10 seconds. Figure 3 C 1 Timer Zone Terminals 2 3 Common Terminal Common Wire Finishing The Installation 1. Once valve operation has been successfully tested with the timer, control wires can be buried and valve box installed. See illustration in Figure 4. Figure 4 Manual Operation 1. Turn valve on manually by turning bleed screw counterclockwise 1/2 turn. See Figure 5. 2. Shut valve off by turning bleed screw clockwise just until resistance is felt. Do not tighten excessively! Note: Valve may take up to 60 seconds to close when operated manually with the bleed screw. Figure 5 On Off 1994 THE TORO COMPANY Irrigation Division Printed in U.S.A. …


 Toro Owners Manual - 1 of 2
 Toro Owners Manual - 2 of 2