From inside (document excerpt):
OPERATOR’S MANUAL ZERO TURN TRACTOR Model Number RZT 50 w/50 ” Mower Deck IMPORTANT: READ SAFETY RULES AND INSTRUCTIONS CAREFULLY Warning: This unit is equipped with an internal combustion engine and should not be used on or near any unimproved forestcovered, brush-covered or grass-covered land unless the engine’s exhaust system is equipped with a spark arrester meeting applicable local or state laws (if any). If a spark arrester is used, it should be maintained in effective working order by the operator.
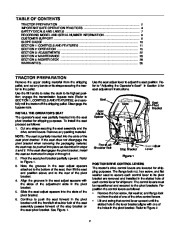
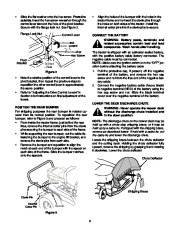
In the State of California the above is required by law (Section 4442 of the California Public Resources Code). Other states may have similar laws. Federal laws apply on federal lands. A spark arrester for the muffler is available through your nearest engine authorized service dealer or contact the service department, P.O. Box 361131 Cleveland, Ohio 44136-0019. Troy-Bilt LLC, P.O. BOX 361131 CLEVELAND, OHIO 44136-0019 PRINTED IN U.S.A. FORM NO. 769-02165D (1/07) TABLE OF CONTENTS TRACTOR PREPARATION . 2 IMPORTANT SAFE OPERATION PRACTICES 4 SAFETY DECALS AND LABELS . 7 RECORDING MODEL AND SERIAL NUMBER INFORMATION . 9 CUSTOMER SUPPORT . 9 SLOPE GAUGE 10 SECTION 1: CONTROLS AND FEATURES 11 SECTION 2: OPERATION . 15 SECTION 3: ADJUSTMENTS 22 SECTION 4: MAINTENANCE 23 SECTION 5: MOWER DECK . 28 WARRANTIES . 35 TRACTOR PREPARATION Remove the upper crating material from the shipping pallet, and cut any bands or tie straps securing the tractor to the pallet. Use the lift handle to raise the deck to its highest position; engage the transmission bypass rods (Refer to SECTION 1, CONTROLS AND FEATURES); and carefully roll the tractor off the shipping pallet. Disengage the bypass rods. INSTALL THE OPERATOR’S SEAT The operator’s seat was partially inserted into the seat pivot bracket for shipping purposes. To install the seat proceed as follows: 1. Cut any straps securing the seat assembly and the drive control levers. Remove any packing material. NOTE: The seat is partially inserted into the slots of the seat pivot bracket. If the seat does not disengage the pivot bracket when removing the packaging material, the seat may be pushed into place as described in steps 2 and 6. If the seat disengages the pivot bracket, install the seat as instructed in steps 2 through 6. 2. Pivot the seat pivot bracket partially upward. Refer to Figure 1. 3. Note the grooves in the seat adjust spacers attached to the bottom of the seat, then lift the seat and position above and to the rear of the pivot bracket. 4. Align the grooves in the seat adjust spacers with the sides of the adjustment slots in the pivot bracket. 5. Slide the seat adjust spacers into the slots of the pivot bracket. 6. Continue to push the seat forward in the pivot bracket until the front/left shoulder bolt of the seat assembly passes forward of the stop bracket on the seat pivot bracket. See Figure 1. Use the seat adjust lever to adjust the seat position. Refer to “Adjusting the Operator’s Seat ” in Section 3 for seat adjustment instructions. Seat Adjustment Slots Seat Pivot Bracket Seat Adjust Spacer Front/Left Shoulder Bolt Stop Bracket Figure 1 Seat Adjust Lever POSITION DRIVE CONTROL LEVERS The tractor’s drive control levers are lowered for shipping purposes. The flange lock nut, hex screw, and flat washer used to secure each control lever to its pivot bracket are removed and installed in the slotted hole of each control lever for shipment. The control levers must be repositioned and secured to the pivot brackets. Reposition the control levers as follows: · Remove the hex screw, flat washer, and flange lock nut from the slot of one of the drive control levers. · Lift and swing that control lever upward until the slotted hole in the lever bracket aligns with one of the holes in the pivot bracket. Refer to Figure 2. 2 · Slide the flat washer onto the hex screw. From the outside, insert the hex screw w/washer through the control lever slot and the hole of the pivot bracket. Secure with the flange lock nut. See Figure 2. Flange Lock Nut Control Lever Lift control lever upward Flat Washer Hex Screw Pivot Bracket Slotted Hole Figure 2 · Align the holes of the bumper with the holes in the tractor frame and re-insert the clevis pins through the holes on both sides of the tractor. Install the internal cotter pins into the clevis pins to secure. CONNECT THE BATTERY WARNING: Battery posts, terminals and related accessories contain lead and lead compounds. Wash hands after handling. The tractor is shipped with an activated sealed battery, with the positive battery cable factory connected. The negative cable must be connected. NOTE: Make sure the ignition switch is in the “OFF ” position before attaching the battery cable. 1. Pull the protective cap, if present, off the negative terminal of the battery, and remove the hex cap screw and nut from the free end of the negative battery cable. 2. Connect the negative battery cable (heavy black) to negative terminal (NEG) of the battery using the hex cap screw and nut. Slide the black terminal cover over the negative terminal of the battery. LOWER THE DECK DISCHARGE CHUTE
Wikipedia’s page for MTD Products
Company Web Site: www.mtdproducts.com


 MTD Troy-Bilt Zero Turn Tractor RZT 50 W Inch Deck Lawn Mower Owners Manual - 1 of 36
 MTD Troy-Bilt Zero Turn Tractor RZT 50 W Inch Deck Lawn Mower Owners Manual - 2 of 36
 MTD Troy-Bilt Zero Turn Tractor RZT 50 W Inch Deck Lawn Mower Owners Manual - 3 of 36
 MTD Troy-Bilt Zero Turn Tractor RZT 50 W Inch Deck Lawn Mower Owners Manual - 4 of 36
 MTD Troy-Bilt Zero Turn Tractor RZT 50 W Inch Deck Lawn Mower Owners Manual - 5 of 36
 MTD Troy-Bilt Zero Turn Tractor RZT 50 W Inch Deck Lawn Mower Owners Manual - 6 of 36
 MTD Troy-Bilt Zero Turn Tractor RZT 50 W Inch Deck Lawn Mower Owners Manual - 7 of 36
 MTD Troy-Bilt Zero Turn Tractor RZT 50 W Inch Deck Lawn Mower Owners Manual - 8 of 36
 MTD Troy-Bilt Zero Turn Tractor RZT 50 W Inch Deck Lawn Mower Owners Manual - 9 of 36
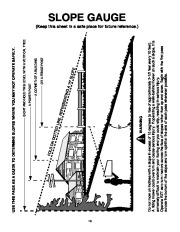 MTD Troy-Bilt Zero Turn Tractor RZT 50 W Inch Deck Lawn Mower Owners Manual - 10 of 36