From inside (document excerpt):
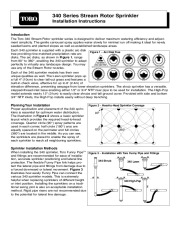
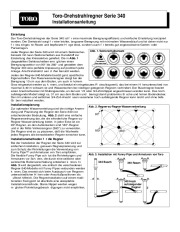
340 Series Stream Rotor Sprinkler Installation Instructions Introduction The Toro 340 Stream Rotor sprinkler series is designed to deliver maximum watering efficiency and adjustment simplicity. The gentle carrousel spray applies water slowly for minimal run off making it ideal for newly seeded lawns and planted slopes as well as established landscape areas. Each 340 sprinkler is supplied with a plastic arc disk tree providing nine matched-precipitation rate arc disks.
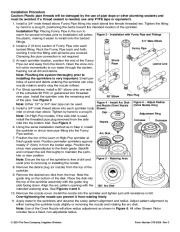
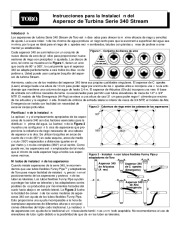
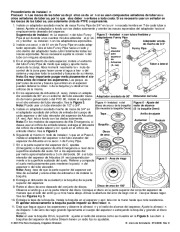
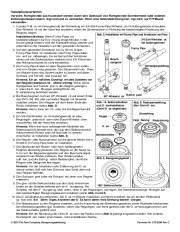
The arc disks, as shown in Figure 1, range from 90° to 360°, enabling the 340 sprinkler to adapt perfectly to virtually any landscape design. You may use any of the Stream Rotor nozzles. Figure 1 Arc Disk Tree Each of the 340 sprinkler models has their own unique qualities as well. The Lawn sprinkler pops up a full 4 ” (10cm) to clear tall-cut grass and features a built-in check valve, effective for up to 8′ (2.4m) of elevation difference, preventing seepage from lower elevation sprinklers. The shrub sprinkler has a versatile, stepped-thread inlet base enabling either 1/2 ” or 3/4 ” NTP riser pipe to be used for installation. The High-Pop model extends nearly 12 ” (31cm) to easily clear shrubs and tall ground cover. Provided with side and bottom 3/4 ” NTP inlets, the High Pop installs easily without deep trenching. Planning Your Installation Proper application and placement of the 340 sprinklers is essential for optimum water distribution. The illustration in Figure 2 shows a basic sprinkler layout which provides the required head-to-head coverage. Quarter circle (90°) spray patterns are used in each corner, half circle (180°) arcs are equally spaced on the perimeter and full circles (360°) are located in the middle. As you can see, the sprinklers are placed to enable the spray of each sprinkler to reach all neighboring sprinklers. Figure 2 Head-to-Head Sprinkler Coverage 90° 180° 360° Sprinkler Installation Methods When installing the 340 sprinkler, Toro Funny PipeTM Figure 3 Installation with Toro Funny Pipe and Fittings and fittings are recommended for ease of installation, accurate sprinkler positioning and lateral line 340 Shrub 340 Lawn protection. The flexible Funny Pipe link helps protect the lateral pipe and fittings from damage due to a forced downward or lateral movement. Figure 3 illustrates how easily Funny Pipe can connect the various 340 sprinkler models. This is extremely helpful when replacing sprinklers of different height 340 High-Pop or inlet position. Installing the sprinklers on a traditional swing joint is also an acceptable installation method. Rigid pipe risers are not recommended due to the potential for lateral line damage. Installation Procedure Caution: Plastic pipe threads will be damaged by the use of pipe dope or other plumbing sealants and must be avoided. If a thread sealant is needed, use only PTFE tape or equivalent. 1. Install a 3/4 ” male thread elbow Funny Pipe fitting into each lateral line female threaded tee. Tighten the fitting by hand to a snug fit, positioning the barbs toward the intended location of the sprinkler. Installation Tip: Placing Funny Pipe in the sun to Figure 3 Installation with Funny Pipe and Fittings warm for several minutes prior to installation will soften the plastic, making it easier to install onto the barbed 3/4 ” Male Elbow fittings. 2. Install a 2′ (61cm) section of Funny Pipe onto each Funny Pipe barbed fitting. Rock the Funny Pipe back and forth, working it onto the fitting until all barbs are covered. Clamping the pipe connection is not required. Shrub 3. At each sprinkler location, position the end of the Funny Riser Lateral Line Pipe out and away from the trench. Open the zone control valve momentarily to run water through the system, flushing out all dirt and debris. Note: Flushing the system thoroughly prior to installing the sprinklers is very important. Small particles of sand and debris entering the sprinkler can stop nozzle rotation and/or clog the nozzle orifices. 4. For Shrub sprinklers, install a 90° elbow onto one end of the schedule 80 PVC or galvanized iron threaded Pipe Plug 90° Elbow riser pipe. Install the sprinkler onto the remaining end of the pipe. See Figure 3. Figure 6 Adjust Radius Figure 4 Install Arc Disk Note: Either 1/2 ” or 3/4 ” riser pipe can be used. (Omni Nozzle Only) and Nozzle (Omni Nozzle 5. Install a 3/4 ” male thread elbow into each sprinkler body Shown) inlet or shrub riser elbow. Tighten by hand to a snug fit. Cap Adjustment Ring Note: On High-Pop models, if the side inlet is used, install the threaded pipe plug removed from the side Increase Decrease Nozzle inlet into the bottom inlet. See Figure 3. 6. Using the same installation method as in Step 2, install the sprinkler or shrub riser pipe fitting into the Funny Arc Disk Pipe section. 7. Position the top of the Lawn or High-Pop sprinkler at finish grade level. Position perimeter sprinklers approximately 2 ” (5cm) in from the border edge. Position the shrub riser perpendicular to the finish grade. Backfill and compact the soil thoroughly to maintain the sprinkler or riser position. Figure 5 Watering Area Note: Ensure the top of the sprinkler is free of dirt and sand prior to removing or installing the nozzle. 8. Remove the debris plug (or nozzle) from the top of the sprinkler. 9. Remove the desired arc disk from the tree. Note the guide ring on the bottom of the disk. Place the disk into the top of the sprinkler assembly with the guide ring side facing down. Align the arc pattern opening with the 180° Arc Disk intended watering area. See Figures 4 and 5. 10. Remove the nozzle cover. Install the nozzle into the sprinkler and tighten just until resistance is felt. Over-tightening the nozzle can prevent it from rotating freely. 11. Apply water to the sprinklers and observe the spray pattern alignment and radius. Adjust pattern alignment by either turning the sprinkler body slightly or removing the nozzle and rotating the arc disk. Note: Use of the Omni Nozzle will allow radius adjustment as shown in Figure 6. All other Stream Rotor nozzles have a fixed, non-adjustable radius. 2001 The Toro Company, Irrigation Division Form Number 373-0036 Rev C Instrucciones para la Instalación del Aspersor de Turbina Serie 340 Stream Introducción Los aspersores de turbina Serie 340 Stream de Toro están diseñados para ofrecer la máxima eficacia de riego y sencillez de ajuste. La suave rotación de los chorros de agua produce un riego lento para que la escorrentía superficial del agua sea mínima, por lo que es ideal para el riego de céspedes recién sembrados, taludes con plantas y áreas de jardinería ornamental ya establecidas. Figura 1 – Conjunto de discos de arco Cada aspersor 340 se suministra con un conjunto de nueve discos de arco de plástico para proporcionar nueve sectores de riego con precipitación ajustada. Los discos de arco, tal como se muestra en la Figura 1, tienen un arco que oscila de 90° a 360°, lo cual permite que el aspersor 340 se adapte perfectamente a casi todos los diseños de jardinería. Usted puede usar cualquier boquilla del aspersor de turbina Stream. Asimismo, cada uno de los modelos del aspersor 340 tiene sus propias cualidades singulares. El aspersor de Céspedes (Lawn) emerge hasta una altura de 10 cm para poder regar por encima de los céspedes altos e incorpora una válvula antidrenaje que mantiene una columna de agua de hasta 2,4 m. El aspersor de Arbustos (Shrub) incorpora una versátil base de entrada con orificios roscados de tamaños escalonados para permitir usar tubos elevadores de rosca de 1/2 ” o 3/4 ” NTP. El modelo de Alta Emergencia (Hi-Pop) se eleva a una altura de casi 31 cm para poder regar fácilmente por encima de los arbustos y la vegetación alta. Dotado de orificios de entrada lateral e inferior de rosca de 3/4 NTP, el modelo de Alta Emergencia se instala con facilidad sin necesidad de Figura 2 – Cobertura de riego entre las cabezas de los aspersores excavar zanjas profundas.


 Toro Owners Manual - 1 of 10
 Toro Owners Manual - 2 of 10
 Toro Owners Manual - 3 of 10
 Toro Owners Manual - 4 of 10
 Toro Owners Manual - 5 of 10
 Toro Owners Manual - 6 of 10
 Toro Owners Manual - 7 of 10
 Toro Owners Manual - 8 of 10
 Toro Owners Manual - 9 of 10
 Toro Owners Manual - 10 of 10